| Permalink: |
The procedure of making mass payments within the BA
The Capitaller service allows members to operate the MassPayment Service for making payments to WM-purses and charging the accounts of cellular operators and ISPs.
To perform mass payments within the budget automation tool (BA) the following adjustments should be made:
- add the MassPayments Service WMID (865974653293) to the BA personnel list;
- grant this WMID access to the expenses purse of the BA from which mass payments are to be made;
- open the Mass Payments Service WMID (865974653293) trusts to perform the following actions:
- check the purse balance (in the "Integration->XML-interfaces" section of the BA enable "X9 interface" );
- make transactions (in the "Integration->XML-interfaces" section of the BA enable "X2 interface" and specify the limits);
- grant the access to this expenses purse to the BA staffer that will create tasks to make payments.
- signes in using his WM Keeper at MassPayments Service website - http://masspayment.wmtransfer.com ;
- uploads the task to make payments;
- specifies the BA purse from which the payments are to be performed, and runs the task.
1. Adjusting the BA for making mass payments
To make mass payments from the BA purses the following settings should be applied.
Add the MassPayments Service WMID to the BA personnel list. For that open the Staff and choose the "New" tap. Type in the WMID of the service - 865974653293, specify the description and click on "Save".
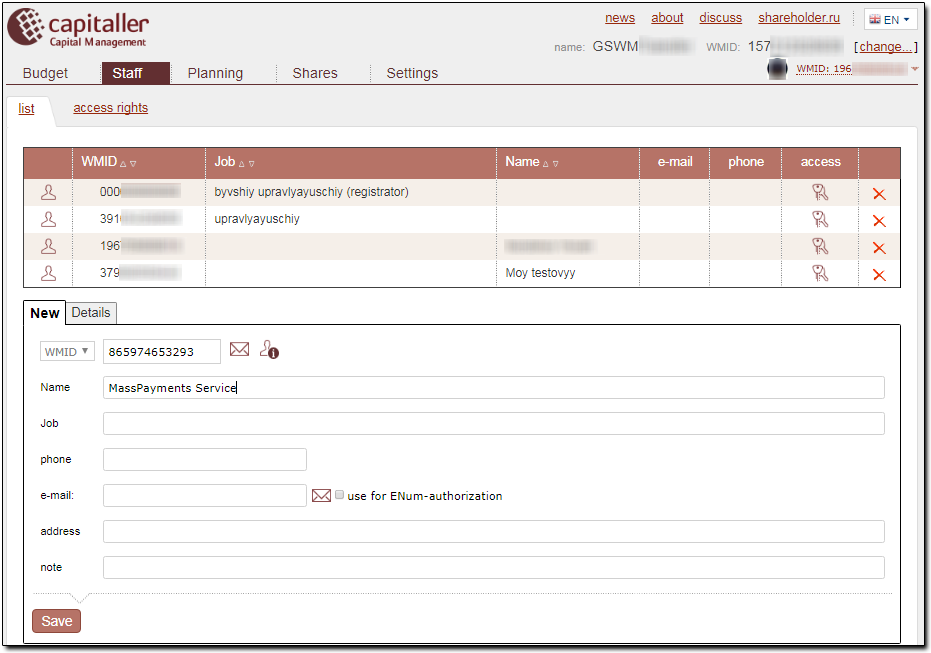
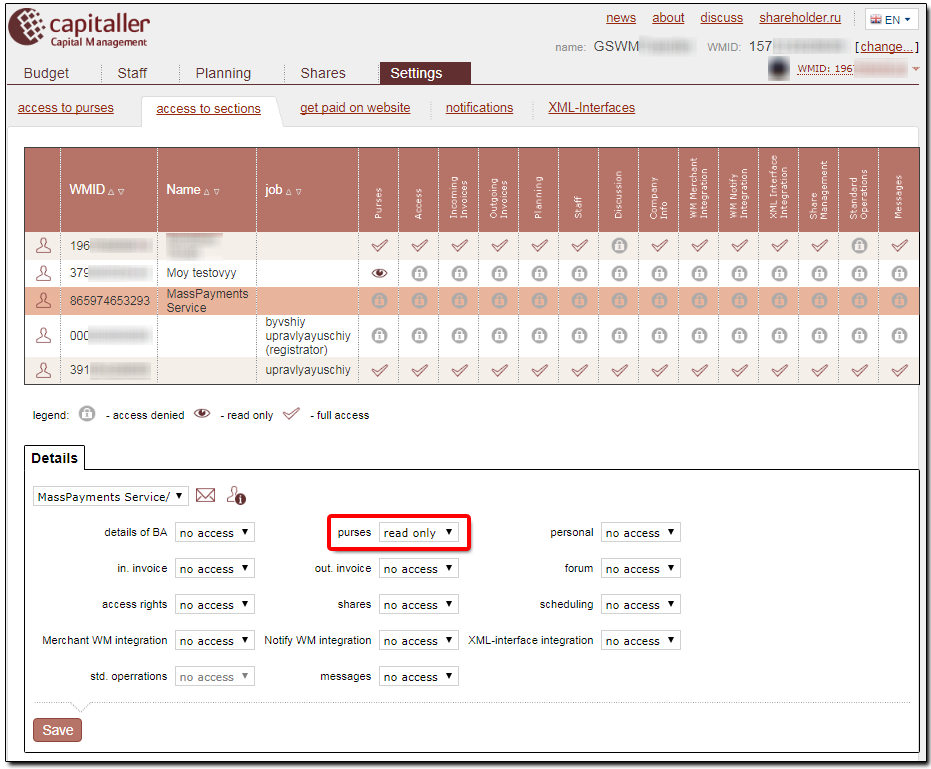
After adding the WMID to the personnel list, click on the button in the "Access" column.
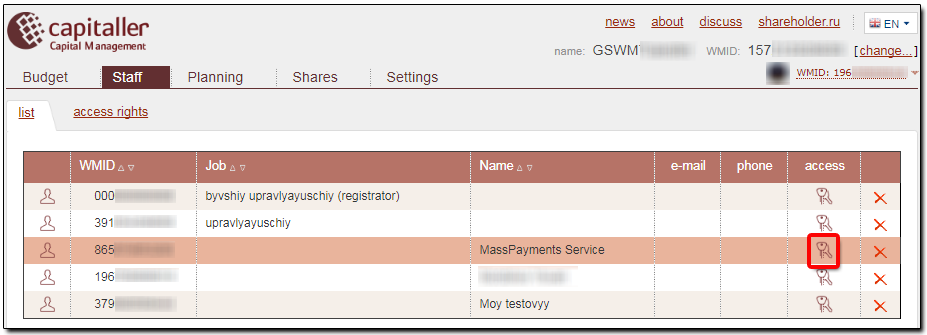
In the next window access privileges for the MassPayments Service should be granted. "Read only" is enough. After that the settings should be applied.
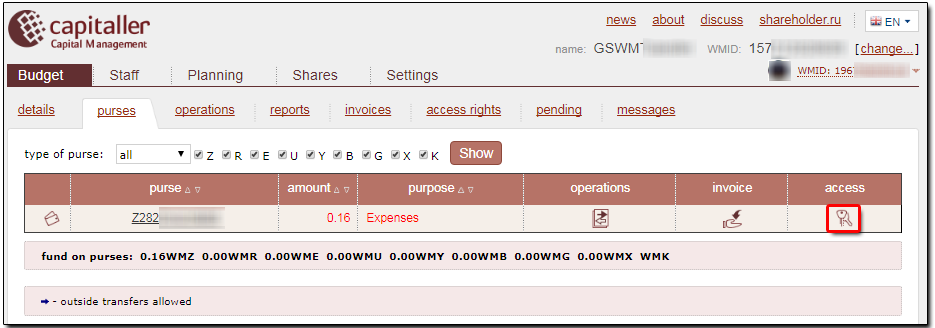
Next it is necessary to grant the WMID of the service access to the expenses purse. For that open the Budget-Purses section and click on the "keys" icon in the "access" column. In our example we choose the "expenses" purse line.
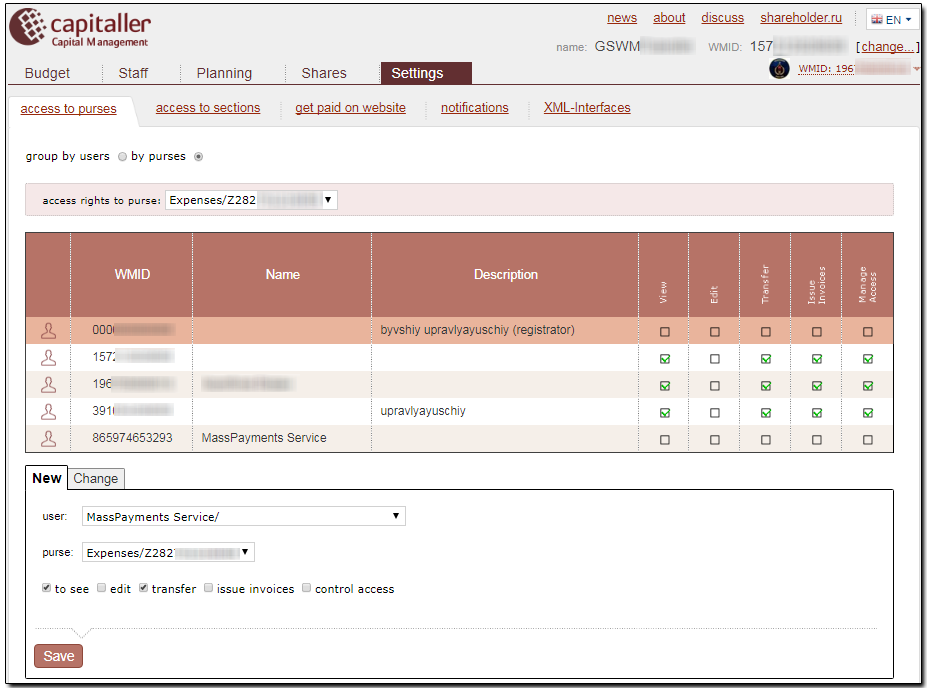
To make a new entry in the "Expenses" purse access rights table, click on the "New" tab. In the drop-down list choose the member name that was specified for the Mass Payments Service, and mark the checkboxes to make the following operations allowed: "to see", "transfer". Then click on "Save".
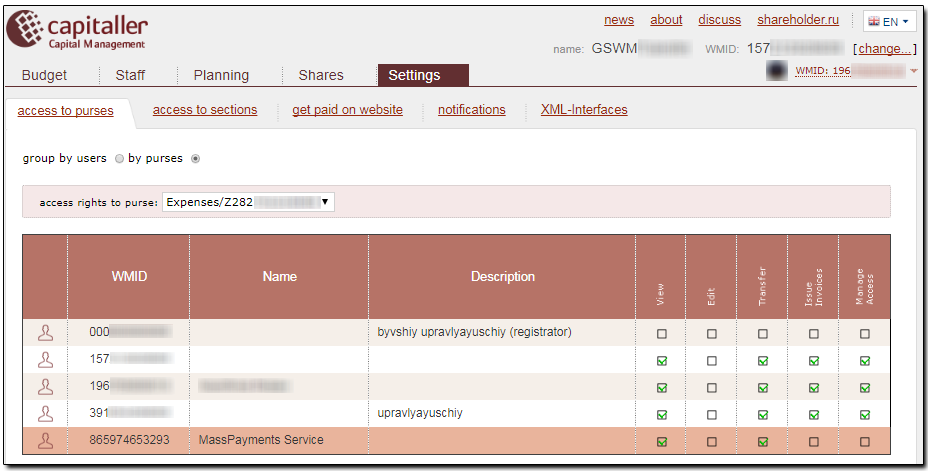
Check the availability of the necessary purse access rights both for MassPayments Service and for the staffer that will create tasks to perform mass payments.
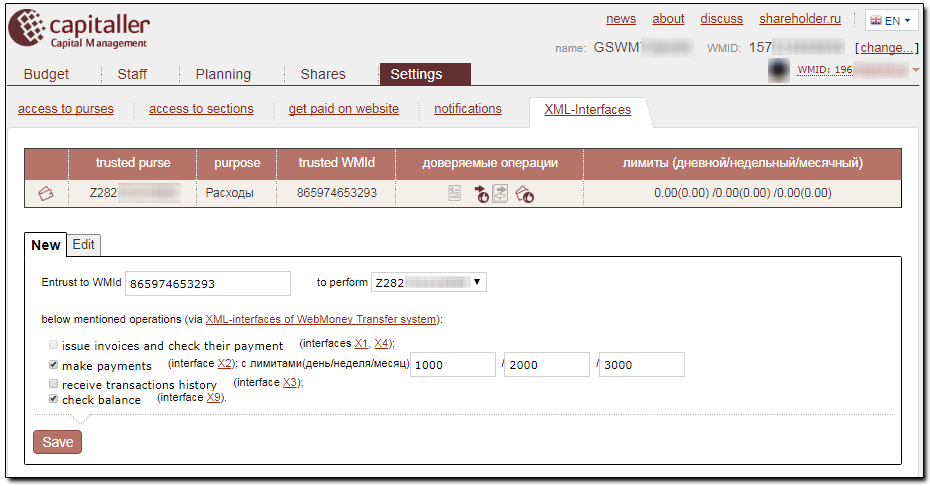
And the final step - granting the WMID of the service trust to check the balance of the "Expenses" purses and to make transfers from it. For that open the Setting->XML-interface section and do the following.
- Type in the WMID of the service 865974653293 in the "Trust WMID" field;
- choose the "expenses" purse number in the "to perform" list;
- mark the "check the purse balance (X9 interface)" checkbox;
- mark the "make transactions (X2 interface)" checkbox and specify the daily, weekly and monthly limits;
Click on "Save".
If it is a new employee who will perform mass payments from the BA purses, he should be added to the BA personnel list and granted the corresponding rights to access the BA sections and purses (for more information see Specifying BA personnel).
From that moment the BA is ready to work with the MassPayments Service.
2. Making mass payments from BA purses
To perform mass payments you should choose the transaction type first:
- payments to WM-purses of other WebMoney members;
- charging the accounts of cellular operators and ISPs: http://masspayment.wmtransfer.com/Contractors
Next, you should create a task file in accordance with the rules of the service.
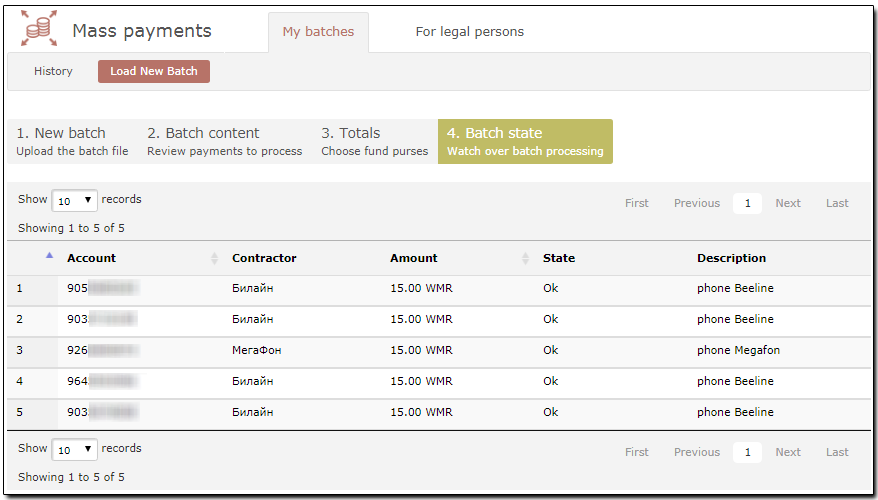
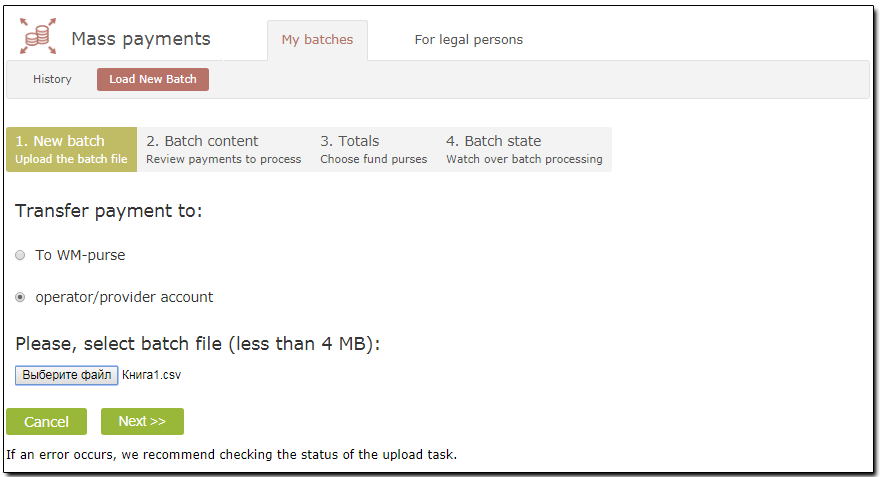
To launch the created task for execution, an authorized staffer should sign in using his WMID on the masspayment.wmtransfer.com website and choose the "My batches" - "Load new bath" section. Specify the transaction type (in our case a test charge of mobile phone accounts of five BA employees will be made), the local path to the task file and click on _"Next".
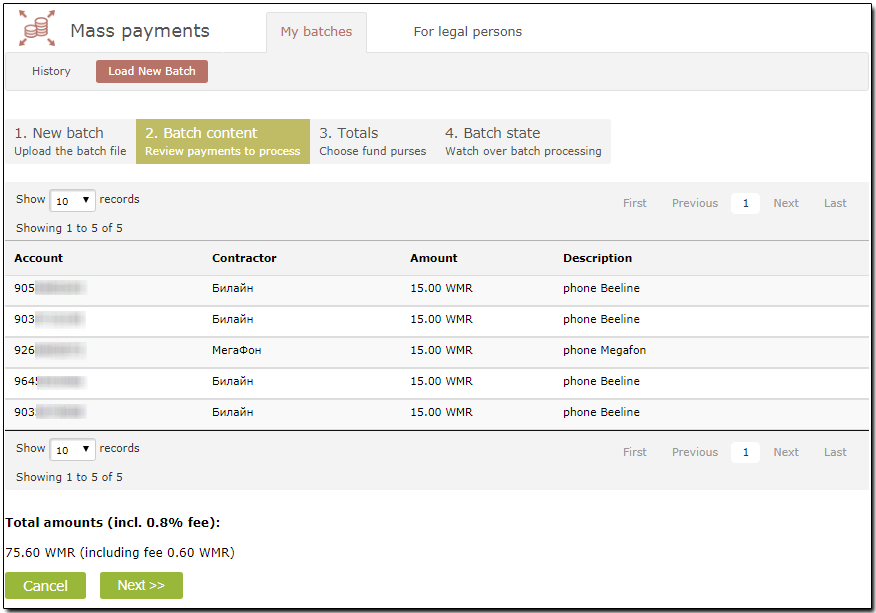
Check the correctness of the payments data and click "Next".
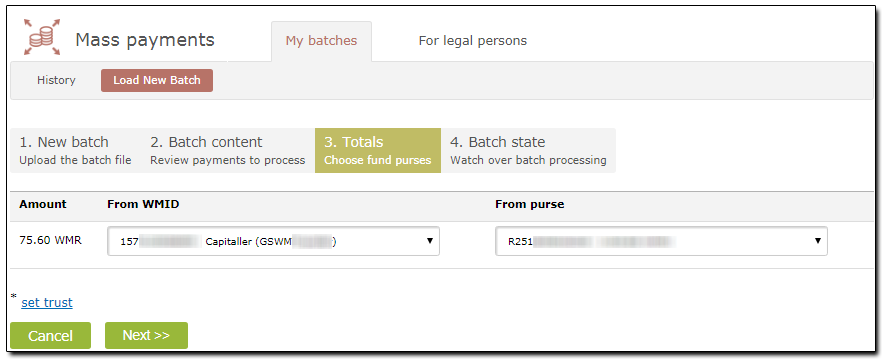
Choose the WMID of the budget automation tool and the purse from which the payment should be made. Click on "Next".
Make sure the result is correct.
